Wednesday, November 30, 2011

Teflon Pressing Sheet

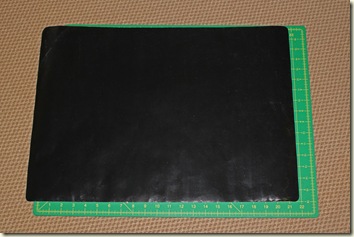
I just learned of another place where Teflon Pressing Sheets can be found and IMG_5774purchased….would you believe it if I said the cooking department of Walmart?  Yes, that is where I found this black one, only it is labeled to use on the bottom of your oven to catch spills while baking.  I bought one, priced about $10 for the 16 1/2” x 23” sheet and it works the same as my other pressing sheets.  A girl just can’t have too many pressing sheets can she?  (Especially when said girl accidentally cuts one with the rotary cutter – oops!) IMG_5775
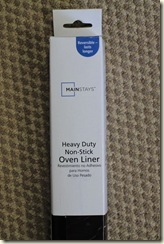
If you don’t live near a quilt shop and need to get one to use right away this is where to look.  I found this one next to the drip pans in the cooking isles.  It is black and the ones I have purchased especially for quilting are either white or tan.  I have experimented with it and it works just the same as the regular quilting ones do but is a little heavier weight than the quilting pressing sheets.  Don’t know if that is an advantage or disadvantage or just doesn’t matter.  I do like the light colored ones better though for their translucent properties as it helps to see the pattern through the sheet for lining up the applique shapes.  You would have to come up with a different method for layering fused shapes if you get this black one.IMG_5781For those of you that don’t know what a Teflon pressing sheet is used for click on the links at the bottom of this post that explain how and where you might use it.  I use mine every time I do fusible applique and use a second Teflon sheet on top to guarantee I don't get any of the glue on my iron.  You can arrange your pieces on it and fuse them together, let it cool then peel them off to arrange on the background fabric.  Works slick as a whistle!

Jan 22, 2009 – My blog post titled Mini Fused Applique  - I tell how I use the Teflon sheet.
Valerie Hearder – Using Teflon Sheet for Fusible Applique
The Clever Quilter – How to use the Teflon sheet
Flo Klein’s Stitch ‘Em Up – How to use the Teflon sheet

Until Later,
Lynn

Tuesday, November 29, 2011

Beef and Noodles

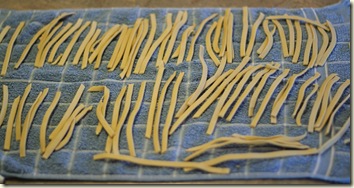
Recently I made some homemade egg noodles - much better than purchased ones.  Not hard to make but I have not made noodles for a long time so had to dig out my recipe – you can find recipes for egg noodles on the internet.  I use my electric  mixer and the dough hook and mix it well and until the ball of dough gets elastic, meaning the gluten is developed.  I don’t kneed my dough by hand as my wrists are wimpy and get tired before the dough is kneeded enough.  I do have a pasta machine I received from my mother in law that works wonders for rolling and cutting the noodles too.  Here are some of the noodles I made all laid out on a kitchen towel to dry and will be bagged up for future use.IMG_5595
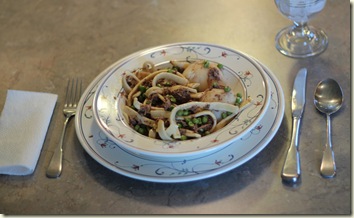
OK, back to the title of my post – Beef and Noodles.  I made a big pot of beef and noodles using my homemade noodles and some canned beef I had purchased at the local processing plant some beef broth and some frozen peas.  Now for the part that I didn’t realize was unusual until recently.  We love our beef and noodles served over potatoes and mashed potatoes being the preferred form.  We also eat chicken and noodle soup the first day as soup and the second day served over potatoes. IMG_5593 Do any of you eat beef and noodles or chicken and noodles over potatoes?  I don’t know if it is a regional thing as I know others around here that eat it that way too but have heard from people that came from places other than Nebraska say they had never heard of it except here in Nebraska.  By the way it is really, really good served this way and when I warmed up these leftovers I was a little short on broth for it to be perfect.  I like my potatoes swimming in plenty of broth but it still was pretty tasty.  If this is new to you and you give it a try please let me know how you like it.

Lynn

Lynn

Thursday, November 24, 2011

Happy Thanksgiving

img1
Today is Thanksgiving day here in the United States, a time to reflect on our blessings.  I am thankful for my family, friends and for the wonderful people that read my blog.  I am thankful that I live here in beautiful rural Nebraska with it’s changing seasons and friendly people.  I am thankful for learning how to quilt in 1981 as quilting has been a very fulfilling art form for me and full of future possibilities.  I am thankful for my computer and the internet as it has opened the world to me in ways I never would have guessed when we purchased our first computer many, many years ago.  Those are just a few of the things I am thankful for and I could make lists and lists of things I am thankful for as could everyone reading this but will stop here. 

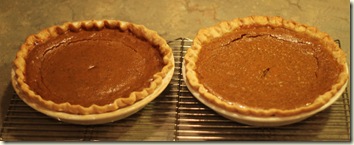
Tomorrow at dinner at my brothers home I will probably eat too much, laugh a lot and get that warm fuzzy feeling all over from time spent with those I love.  Just the best things to have for Thanksgiving day.IMG_5596Speaking of eating too much, my part of the dinner is to bring the dessert, and what says Thanksgiving dessert more than pumpkin pie.  I made two this afternoon and have purchased some whipping cream that will get beat up into a sweet, white topping for each slice.  Can’t wait!

Happy, Happy Thanksgiving from my house to yours!
Lynn

Tuesday, November 22, 2011

Wow, Lots and Lots of Blog Visitors

Feedgit

I am always interested in who and where my blog visitors are from and how many people are visiting my blog.  That is why I added the Noecounter widget and the Feedgit Live Traffic Feed widget to the side bar of my blog a few months after I started blogging.  Both have a free Untitled-2version which I have, and a paid version.  I am not sure blogger had the Stats page when I started my blog in 2008 or I just didn’t know about it then so added these two widgets to keep track of those things but now think you can get so much more information from the Stats area of Blogger that I check it out pretty often too.
 

I look at Feedjit every few days to see what sites people have arrived from and it is always interesting to me to see what countries my visitors are from.  Like I said I don’t look at it every day but have been paying attention to the total number of visitors the Noecounter says have visited lately as I was almost up to 30,000 visitors on Saturday and thought it would be fun to see it turn over.
 

Last night when I got home from a very nice dinner with our daughter and her family I turned on the computer and brought up my blog andIMG_4668[3] was amazed the number was up to almost 50,000 and when I clicked on the Feedjit widget to see it live, the number of hits on my blog were turning over the entire list every 5 minutes or less and most of visitors were looking at one particular blog post  Easy No Sew Fleece Blanket Edging that I posted on September 23, 2011.  I had posted it on the Sew Many Ways blog as she has a Sew Darn Crafty Party every Sunday where you can link one of your blog posts of a project you have worked that week or any other time.  I posted a link to this blog on week 33 in September and since that time have had quite a few hits from her site.  The large increase the last few days has come I think because it has been re-posted several times to Pinterest.  I have seen several other referring sites too but think the Pinterest is the “biggy”.  As you can see from the Neocounter numbers at the bottom my visitor numbers are up to 65,239 visitors (this was at 4:00 pm Monday) and up to 123 different countries and it was 117 countries just a few days ago.  I also have more people following my blog than before too so that is quite exciting for me.  I do know the Stats page of blogger has a lot more hits than 65,000 so don’t know which is correct but do know that the number has grown lots recently as well.
IMG_6764-L
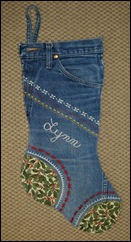
I have posted several times to Sew Many Ways craft party and get lots of hits each time.  Another popular one is when I posted last fall to the Sunday Sew Darn Crafty Party about making the Christmas Stockings from old, worn out jeans.  Another quick and easy project and they were so fun to make and my family loved them.  There are several posts where I try to give detailed instructions on how to make them and tips so to make it easy the links are collected on my Tips and Tutorial Page.  The Denim pot holder has also been getting it’s share of hits and it is posted on the Tips and Tutorial Page so check it out too if you are interested.

I want to say a big THANK YOU to everyone who reads what I write and can understand my stories about my quilting/sewing life and the farm and daily living entries I have posted over the years.  I am not a professional writer by any means and try to re-read my posts to make sure they make sense and are easy to understand and am always thrilled with comments or questions and I try hard to respond to every one.  I love that over 100 people are “Following” me publicly now too.   When I started this blog in March of 2008 I didn’t tell anyone I was doing it for over a year…..just let my posts hang out there on the internet for anyone that could find them.  Gradually I told people and joined a few lists where posts would get publicized so it has been slow growth but I have enjoyed blogging immensely over the years.  It is a great way to document my sewing/quilting and to put into words the things that go on in my life and on our farm.  Many people don’t live on farms or have any association with farmers so really don’t know what and how we do things in this modern age on a mid western farm here in the United States so hopefully I have helped fill in the gaps of knowledge there too.  Great to get to know a few of you too when I follow your blogs and correspond with you – my theory is the more friends a person has the richer they are in life.

Ta, ta for now and I will be watching that counter roll and roll.

Lynn

Sunday, November 20, 2011

Stitching the Design and Removing the Water Soluble Film

IMG_5418
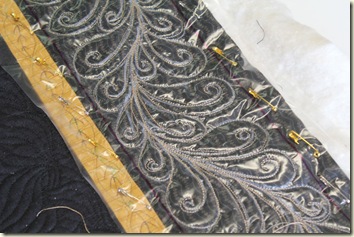
I used a shiny gold colored thread and followed the lines on the water soluble film as best I could.  I did find it made the edge of the quilt a little stiff so I wobbled every once in a while.  Of course I might have wobbled anyway as I am not an expert machine quilter but why not use that as an excuse – ha, ha!

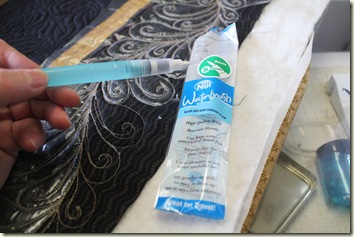
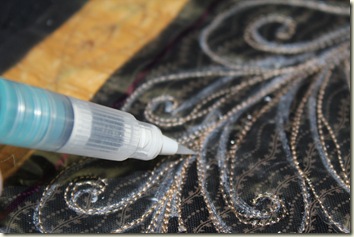
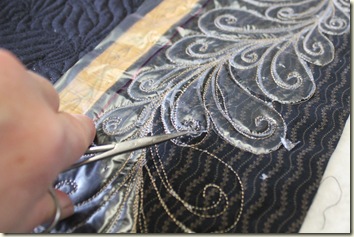
Since the water soluble film was quite heavy it didn’t want to tear off the stitches.  I didn’t want to wet the entire film to remove it so came up with an alternate method.  I first used a regular paint brush and a cup of water and just painted the lines of stitching.  The plastic could be lifted off the un-stitched areas slick as could be.  As I was using the paint brush I remembered I bought a Yasutomo Niji Waterbrush at Paducah that I had never used with the water color pencils also unused.    (Must get them out and actually use them soon.)  I dug the brush out of my drawer of miscellaneous quilt stuff and put it to work.  It was nice not to have to dip my brush into water all the time, just had to give this waterbrush a little squeeze to get more water into the bristles.IMG_5420
To fill it you unscrew the top and squeeze the barrel while holding it under water.  As the brush gets dry the soft plastic barrel is squeezed to re-saturate the brush.  I just painted the stitching lines and that was enough to melt the plastic so the rest could be removed with the small hemostats I used to grab the pieces to remove them.


IMG_5421
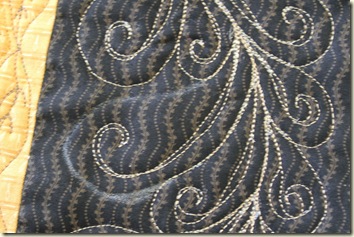
Of course there are tiny bits left but when I wash this quilt the rest should all dissolve and wash away.  This removal took a little time but really wasn’t too bad, especially when I did it while watching TV.  I had a little mess of tiny pieces to vacuum up around my chair when I was finished though.

After getting all the plastic film off the quilt borders I examined my stitching.  The parts that were really squiggly and wiggly I removed and re-quilted them.  I traced the original stitching lines with that same white chubby crayon that comes off when ironed to mark where the stitching would be re-stitched.  IMG_5471
The next step I will take when all the boo-boos are fixed is to echo quilt around my feathered designs.  I will be using black thread so it doesn’t detract from my feathers and make the feathers stand out more.  I am thinking this may take a while and right now I don’t know how many rows I will be doing until I actually start stitching it.  Don’t look for a report on that stitching as I will probably keep the rest a secret until the unveiling in May 2012.  I know, it is unfair to get teased about this quilt and not get to see it and if I knew for sure none of quilt guild members read this blog I would be more open about showing everything right now.

This has been a fun quilt to work on so far.  Have been thinking about what I want to do next but right now have no idea.  I could start working on the program I am going to give for my quilt guild in January – Tips and Tricks for Making Bags/Purses.  I have lots of ideas and things I want to show and tell about but need to get it all organized and probably should start soon.  I want to make samples, compile lists of resources for patterns, and relay other tips and tricks I have picked up when making bags.  I like doing programs as I always learn so much so volunteer to give programs on something I want to know more about.  Our guild has only about 30 members and have a variety of programs but can't afford to bring in big name quilters so have a lot of member given programs.  They cover a big variety of subjects and everyone appreciates the work put in to prepare.  The more I type about this program the more I am convinced I had better start as time will go quickly the next couple of months.

 Until Later,
Lynn

Friday, November 18, 2011

Sunsets–Beautiful Nebraska Sunsets

IMG_5568I love the sunsets we get here in Nebraska but I imagine the sunsets are beautiful in other parts of the world too.  This is a view of our place including the house, barn, shop, machine storage shed and grain bins with the clouds and pretty color behind them all.
IMG_5572This photo was taken from my sewing room window and about 15 minutes after this was taken it was dark and it was snowing little tiny snow balls.  It didn’t snow much but the snow looked like those little Styrofoam balls used in bean bags. It was a quick moving storm and the snow balls (pebbles?) melted right away.

Lynn

Wednesday, November 16, 2011

Slippery Quilting Surface

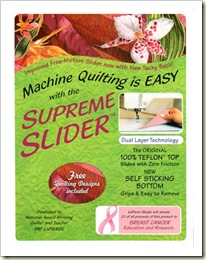
sliderI like to have slick or slippery surface when I am machine quilting.   The quilt moves easier and my shoulders and arms don’t get so tired if the surface is smooth and slick.  I do have one of the Supreme Sliders, a small Teflon sheet, taped to my machine but it only covers an area about the size of a piece of copy paper.  It works well and I do like it but need/want a larger area that is slippery.

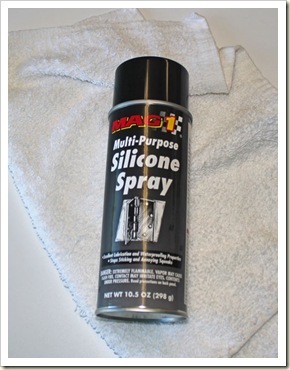
I read about using silicone spray so set out to find some and give it a try.  I found this can in the hardware department so bought it and took it home.  At first I didn’t want to just IMG_4943spray the sewing table surface and take a chance on getting drift of spray into my sewing machine so I sprayed it on a cloth and wiped the table.  That worked but did take a little time to do.  Next I covered my machine and tried spraying the table and that also worked and was much faster.  I was really surprised at what a good job it did in making the quilt move so much easier when I was machine quilting.  After a few days of quilting I did re-apply it to keep it slick.  I don’t know if the spray would cause problems with the workings of my sewing machine but just didn’t take the chance so that is why I covered it before I sprayed the silicone.

Have any of you used silicone spray and how did you like it?  Any problems with it?

Happy Quilting,
Lynn

Monday, November 14, 2011

Transferring The Quilting Designs

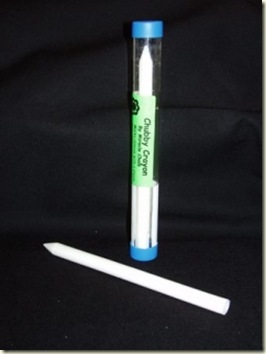
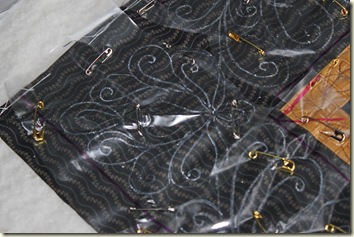
Yesterday I showed you the design I am going to use on the border quilting and today I am going to share how I got that design onto the black basted quilt border.  I thought about making a stencil but didn’t want the work of cutting all those channels so came up with another idea.IMG_5412I cut a piece of water soluble plastic like material and laid it over the quilting design I had drawn.  I don’t know what the brand name of this plastic film is but have had it a long time and think I remember buying it in the machine embroidery section of the fabric store.  It is heavier than Solvy, another product that looks like clear plastic and dissolves in water.chubbyweblargeI marked the design with the Chubby Crayon by Miracle Chalk.  It feels like a crayon, marks white marks on fabric or this plastic and the website says has chalk in it too that will disappear with heat from an iron.  I don’t think I need it to disappear since I am marking on the plastic but didn’t want to use a regular crayon in case some marks might transfer over to the black fabric.
I taped the plastic stuff (sure wish I could remember what it is called) to my newsprint design and traced the design with the Chubby Crayon.  I drew the outside registration marks with a pink permanent marker (follow the arrow to see the line) to make it easier to line up straight on the border.  You can see the marks after I put a purple folder under the plastic.

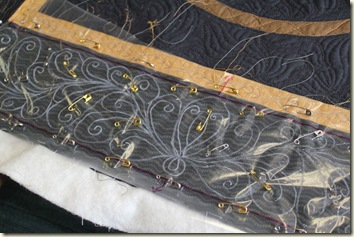
I used safety pins to attach the plastic to the border, centering it as I pinned.  I did remove the hand basting on that black border as I wouldn’t be able to get it out before crossing over it and stitching it down. IMG_5405I did cut the corner design off and positioned it exactly on the corner of the border as it was just a little off and I can extend the quilting lines to get it all connected I hope.  IMG_5408
I have all 4 sides pinned and ready to quilt and am anxious to find out if my “great idea” will turn out like I hope it will.  I do have it pinned down pretty flat so hope I don’t get any tucks or pleats.  I will let you know how the quilting goes on this border right away and won’t make you wait until the big reveal in May.

Until Later,
Lynn

Saturday, November 12, 2011

Quilting Designs For The Borders

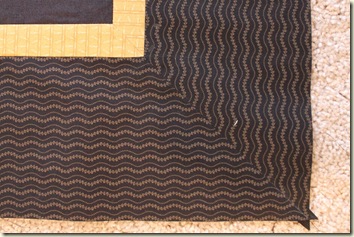
I know I should have figured out what I wanted to quilt in the borders of my Guild Panel Challenge before I basted and quilted the center but I was just too impatient and figured I would deal with it later.  IMG_4860I got the middle quilted and then came to a complete stop when I didn’t know what to quilt in this approximately 6” wide border.  (I worked really hard to get those wiggly stripes in the black fabric to match on the corners too.)  I wasn’t sure how I would even mark the designs I did come up with but I decided I wanted a curvy border so set about getting my curves figured out and drawn on to long pieces matching the border lengths.  I keep a end roll of newsprint I got from the local newspaper office for free to draw my designs on-check it out to see if your newspaper office has these end rolls for free or little charge. You can cut off large pieces of paper to use to draw long border designs, quilting designs, applique designs or for kids to draw and color on. IMG_5400
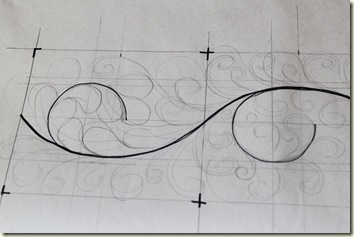
I started out drawing the number of sections each border would have and drew a gentle curve to be the center spine of my design.  I had several copies of each of these borders to sketch ideas on in pencil with the spine drawn in a dark black marker.  As you can see I was thinking of curl back parts on the design.  I had several design ideas and tweaked and tweaked the design until I came up with my final design.
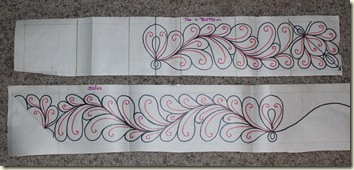
Here are the final border designs, drawn out with black and orange marker.  As you can see I abandoned the back curls and I only drew only half the border as the other half is just the same only reversed. IMG_5412
I do like the design and tomorrow I will show and tell you how I got this design transferred to the black border of the basted quilt so stay tuned. 

Until Later,
Lynn

Thursday, November 10, 2011

My Sister’s Quilt Top

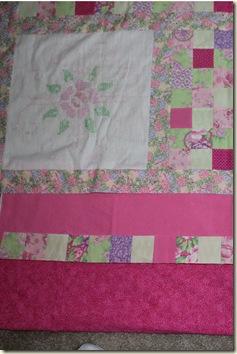
My sister and her husband just visited us overnight on their way to visit my mother and my sis brought a quilt top she is putting together and I wanted to show you how pretty hand cross-stitched blocks can look.  She cross-stitched these 12 pre-printed blocks at least 10 years ago and had them tucked away ever since then.  She did tell me that the blocks were originally 16” square but she trimmed them down to 14” so there wouldn’t be so much white in the quilt.  You can’t see it too well but there is one row of pink cross-stitches in an design around the flower and leaves in each block.IMG_5390She has pieced a section of scrappy 2” squares to add width between the blocks and added a floral print as sashing around each block.  My photos just don’t show how delicate the blocks look and how springy the quilt will be with the two pink fabrics used in the outside borders between more pieced 2” blocks.IMG_5391
She has a church group lined up to do the hand quilting so is wanting to get the borders on and the quilt ready when they call.  I can’t wait to see it finished. 

My sister has not done a lot of quilt piecing but has sewn her whole life and can stitch up a garment in no time flat and she does a good job on her quilt piecing too.  Both my sisters and I sewed clothing starting from age 7 or 8 as our mother was a great seamstress and taught her daughters to love to sew as well.  Mom is so glad we all still love to sew even though she isn’t able to anymore and always likes to see what projects we are working on.  I am sure she is going to love seeing this pretty pink quilt.

Happy Quilting,
Lynn

Tuesday, November 8, 2011

Uh-Oh….A Couple Of Quilting Boo-Boos!

I was just whizzing along doing the machine quilting on the guild Panel Challenge and didn’t even know I had a portion turned under, so you can guess what happened.  Yes I quilted part of the edge to the center so had to rip out that part of the quilting and re-do it.  I do remember that the machine seemed to be working hard and I was figuring I would need to change needles and clean out the lint as I thought that might be the problem.IMG_4974
I got it ripped out and was sailing along again and so proud of myself for how the quilting was going.  Had a stopping point so took it out of the machine and spread it out to look at it…..beautiful!  I wondered how the back was looking so flipped it over.  (I was quilting with black thread on the top and gold thread on the back so wondered if the tension was still good as I didn’t want a lot of black thread showing and this is what I saw.  IMG_5151
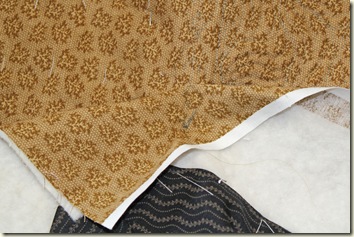
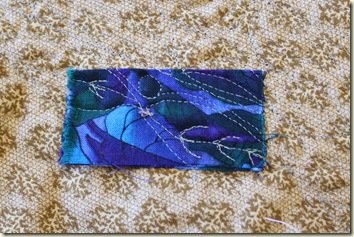
What a pretty piece of fabric don’t you think?  Very pretty, but it sure doesn’t belong on the back of this quilt and it is two layers of fabric as well.  This is a folded piece that I use for a leader or ender when chain sewing pieces together.  I wonder how it got stuck to the back of my quilt and where it came from?  Wherever it came from I stitched it down good and it had to be removed.  I didn’t want to rip out my stitching so tried a very scary technique as I used a very sharp, skinny pointed scissors to cut just on the outside of the stitches.  I then used tweezers to pull the blue fabric threads from under the stitches.  It took a while but I was successful – YAY!IMG_5153
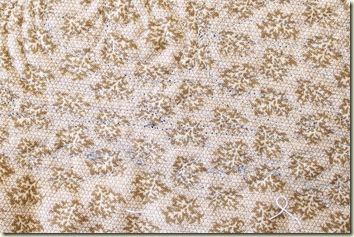
This procedure is not for the faint of heart to be sure.  There are a few fuzzies of blue still in the stitches but those will be removed with painters tape and even I won't be able to find the spot later. I do have a few black dots of the top thread showing on the back but not bad enough to remove.  Onward now to finish quilting this quilt!

Until later,
Lynn

Monday, November 7, 2011

Another Winner

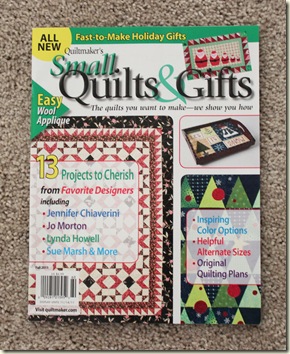
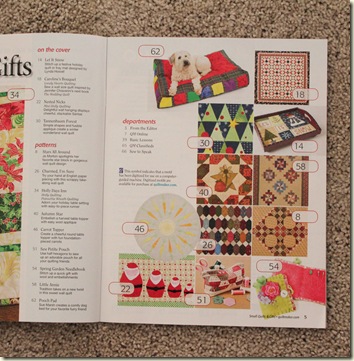
I am happy to announce that I won another blog giveaway, can you believe it?  This giveaway was from the blog Quilty Pleasures a blog for Quiltmaker Magazine.  I am the recipient of Quiltmaker’s magazine “Small Quilts and Gifts.” and it just came in the mail.  The giveaway was sometime ago and I can’t find the post telling about it right now....I can’t believe it I won another giveaway.  I must do one on my site soon but need to figure out what to give away.  IMG_5415This magazine has lots of small projects but nice looking projects in it.  The patterns and directions are all in there…I can see several that interest me right away.IMG_5416
Check out the Quilty Pleasures blog as there is another big giveaway going on now through Quiltmaker with lots of prizes….I think it is still going on so hurry to check it out.

Until Later,
Lynn

Saturday, November 5, 2011

Improved Basting Boards

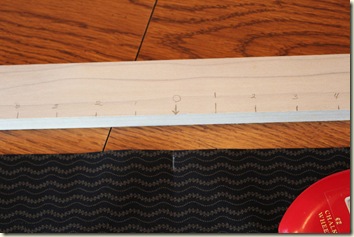
I have used Sharon Schamber’s method of basting the three layers of a quilt together with the use of two boards for several years.  Sharon has a couple of great videos on YouTube here and here that shows in great detail how she does it.  When you have time check out her other videos as she goes in great detail no matter what she is teaching on her videos.IMG_4873When I basted this mystery challenge quilt (that I can’t show you yet) I improved the technique a little.  I took my two boards and marked the center point and then marked one inch increments to the end of the boards.  I numbered the center at 0 then 1s on either side, then 2s next and so on to the last mark.  I can position my top and backing more easily on the center of the boards after marking the center of the quilt and the quilt backing.IMG_4875
I use painter’s tape to get my backing and quilt top started on the boards then carefully roll them up, keeping the ends as even as I can so it is rolled straight.
Lay the batting on a section of unrolled backing smoothing it to the backing then center a portion of the unrolled quilt top smoothing it down too, then baste the layers together.  I keep my basting lines about 2 fingers distance apart.
You did get a peek at which panel I choose to work on but now you can wonder what I did to it.  It is really hard not to share everything I am doing to this quilt as I am working on it.  May give you a few more sneak peeks before I finish it……just have to wait and see.

Lynn

Harvesting Corn

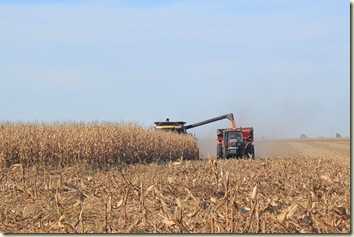
This first photo shows the combine dumping harvested corn onto the grain cart pulled by the tractor.  They do this on the go so you must drive steady so it doesn’t get dumped on the ground.  The combine makes better time with this method if you have enough workers to have one in the tractor/grain cart and one or two driving the trucks as they are filled plus the combine driver.
IMG_5301
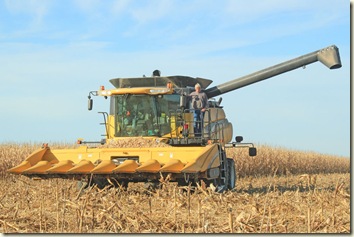
John standing on the deck outside the combine cab for this photo op.  The new combine is working well so he has a smile on his face even though you can’t see it.
IMG_5319
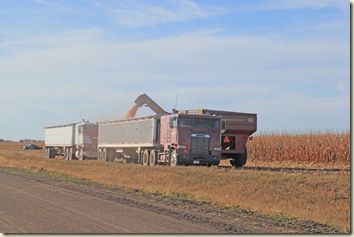
This photo shows the driver of the tractor/grain cart dumping the harvested corn onto one of the semi-trucks which will haul it to the grain elevator or our bins.  IMG_5330
This was my job a few years ago.  I couldn’t help last year because of my broken ankle and I really don’t like running that large equipment and asked John if he could get along without me that would be just fine and dandy as far as I was concerned.  I didn’t have to be in the tractor at all this year but concentrated my efforts on making good hot meals to take to the field.  Our crew doesn’t like to stop and eat anything with a fork or spoon so I had to be real creative to make hot, hand held meals.  Think I did a good job as John commented several times on how good something tasted.  The crew all bring sack lunches at noon so I would just bring something hot at night for the evening meal (actually think they bring small coolers but you get the idea.)  They put in long days working until 10 pm at night lots of nights during harvest so everyone is relieved when it is over.

Lynn

Friday, November 4, 2011

Grain Elevator

This is another post on harvest.  My mother visited us for a couple of days so we went for a ride to the local elevator where we take our grain.  She enjoys getting out and seeing things that are going on as she lived on the farm where I grew up for over 50 years and misses seeing all the activity. IMG_5266
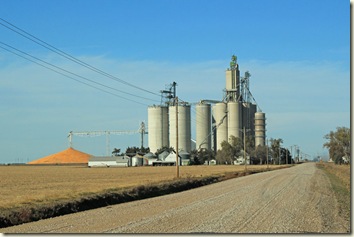
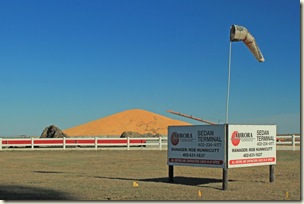
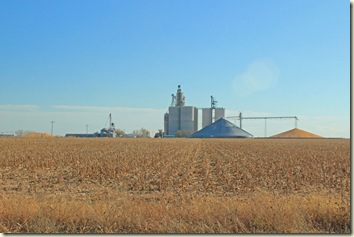
We store a lot of our own grain but most of the landlords share gets hauled to the elevator right at harvest time.  This photo was taken 1/2 mile south of the grain elevator and as you can see a large pile of corn is being dumped west of the silos.  The elevator silos and extra bin storage is full so excess corn is piled on the ground and gradually cleaned up and put on trains later this winter.  I just asked John as I was typing this post and he said there is probably close to 1 million bushels of corn in this pile alone plus there is a pile about half that size across the road east of the main elevator.  This is a very busy elevator located along a main line Union Pacific railroad track.  Grain hauled to this elevator comes from farms 10 to 15 miles away and closer.  Our area of Nebraska is mostly farm ground with farmsteads (barns, houses, cow lots, etc.) scattered here and there but it is mostly farm ground and it produces lots and lots of grain.

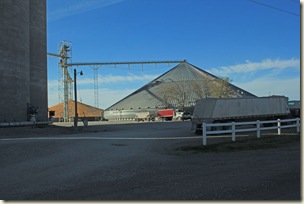
These two photos were taken on the road right in front of the elevator.  You can peek at the big pile to the west behind the large bin and the smaller pile to the east of the road.
IMG_5268IMG_5272
The photo below was taken from 1/2 mile north of the elevator looking across a harvested field of corn and you can see both piles and all the silos and bins where grain is stored.IMG_5284
Until Later,
Lynn

Thursday, November 3, 2011

A New Combine

We purchased a new combine during harvest, well not exactly new but new to us.  It is a 2004 model and our old one was a 2000 model.  Both are New Holland brand combines.  The old one was breaking down about every other day and the dealer gave us a good deal on trade for this newer one so we took it.  It was delivered on the 20th and made the last of harvest go so much smoother.  When new combines run from $200,000 to $300,000 it is a big deal to get a new one.  When you spend as much as a small house even on a used combine it is a really big deal!IMG_4983
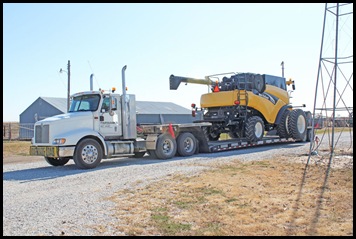
The truck that it was delivered on was really interesting.  To get the combine on and off the trailer the bed was lowered to the ground and the truck unhooked from it and driven away then the combine just drove off.  They loaded the old combine on and re-hooked up the truck.  Pretty slick!IMG_5068
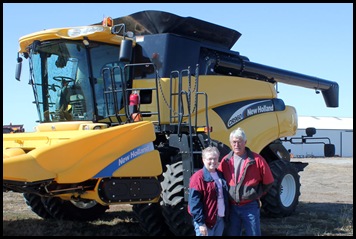
Photo op. in front of the new combine for John and I before it gets all dirty.  This will be the last new combine we own before we retire unless something happens to this one to make it not usable.  We won’t be retiring for several more years yet though so it must last.IMG_5134
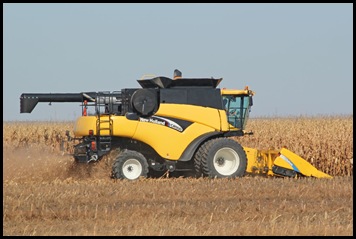
This is the new combine on it’s first run through the field across the road from our house.  It worked well to finish up harvest with a couple of small breakdowns – a bearing went out once and a chain broke on the corn head but wear and tear on machines is expected, especially since this is a used combine.  When I say corn head I mean the pointy things that gather the corn and feed it into the combine.  You can buy different heads for combines to do different things.  We had to buy a new corn head for this new combine as the old one didn’t fit but was able to keep the old wheat head we use to combine soybeans.  It has a reel that helps to bring the beans and wheat into the head then into the feederhouse where it is shelled out.  It will have to be retrofitted this winter though so it can be used next harvest on this combine.  There are also bean heads and we have one but plan to sell it this winter as we can’t use it on this combine.

Of course these heads all come separately and cost and arm and a leg too.  If you are going to be a farmer you have to have a lot of money invested in machinery with all the tractors, grain carts, planters, disc, stock chopper, trucks, cultivators, fertilizer rigs, etc. to name a few.  You just can’t farm without this equipment so that is one reason farmers in the US farm so many acres.  We need many acres to pay for the equipment and other inputs so when we sell the grain we can hopefully make a profit. 

Input estimates that John has made for next year total $500 an acre for corn which includes seed cost, fertilizer, crop insurance, chemicals such as herbicide and insecticide and irrigation energy to water the crop.  So you can see when we farm almost 1000 acres of corn it adds up in a hurry.  This sounds like a lot to farm when you add in the 500 acres of soybeans but in our area we are medium to smaller farmers.  We have been lucky corn prices have stayed up to be more than a break even proposition to farm but there have been many years where we really didn’t make much at all after all the costs were taken out.  Farmers handle lots of money that it comes in but goes out again on upgrades and supplies just as quickly.

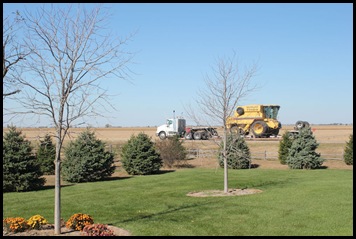
That is it for farming 101 this time.  This last photo is of the old combine heading down the road leaving our farm for the last time….Good bye old yeller.
IMG_5077
Lynn

LinkWithin

Related Posts Plugin for WordPress, Blogger...